Step 1: Name Your Plan
Name Your Plan is the first step of the planning process and allows you to add a plan Name and Description. Follow the steps below to continue:
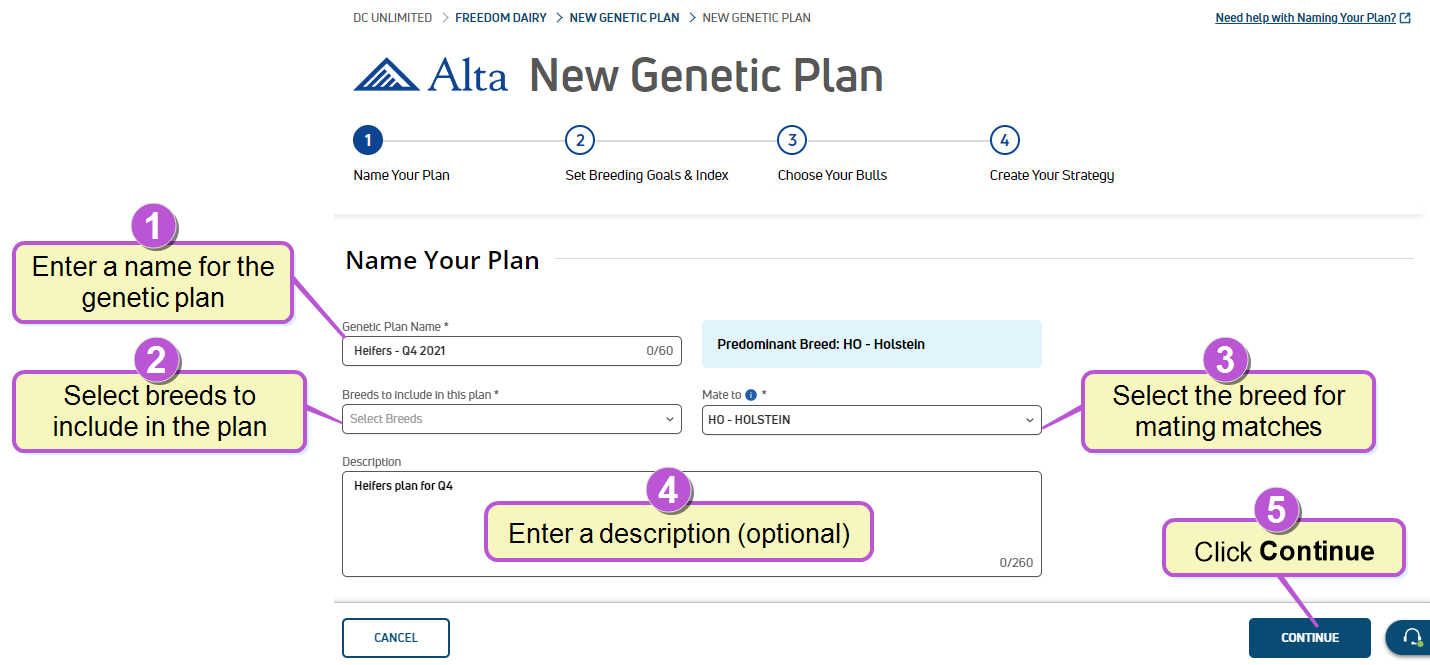
- Add a descriptive name. For example, you may choose to include the animals the plan applies to and the date: Heifers - Q4 2024. Descriptive names will make sorting through plans easier as more plans are added.
- Select the animals to include in the plan. Select All animals to include all animals in the plan or Custom and follow the steps below to only include animals from a specific pen or PSTRG:
 What is a PSTRG?
A PSTRG is another way to group animals from a herd together, similar to a pen. However, a PSTRG can include multiple pens. To view a list of existing PSTRGs, enter SUM BY pen PSTRG in the command line.
- PSTRG users: From the PSTRG drop-down list, select the PSTRG. From the PEN Pen number drop-down list, select All to include all pens from the PSTRG or Custom and enter specific pen or a pen range.
- All other users: From the PSTRG drop-down list, select PSTRG=- (hyphen)or PSTRG=0. In the PEN drop-down list, select Custom and enter a specific pen or a pen range.
- PSTRG users: From the PSTRG drop-down list, select the PSTRG. From the PEN
- Select the breed(s) to include in the plan from the drop-down list. This selection will filter only animals of the selected breed(s) for the new genetic plan. Unselected animals will not be mated. Once set, the breeds cannot be changed after you click Continue. All genetic data is breed-specific, so if you select the wrong breed in this step, you will need to create a new plan.
- Select the sire breed you want to mate your animals to.
- Select the breed you want to use for index and parent average calculations, projections, and missing data if needed.
- Add a note to capture the primary goals for the plan. For example: Heifers plan for Q4.
- Click Continue and proceed to Step 2: Set Breeding Goals & Index.
IMPORTANT: Note that if you edit the choices in this step, it may reset selections in later steps. Review all of your selections before activating your plan.
Last Built: November 11, 2025